Configuration
If you're busy, you can get your bot configured for you with the configuration service
Adding the bot to your guild
The first step is to log in to the settings panel, which is part of the Portal web application.
Managed bot
Go to your subdomain or custom domain followed by /settings (e.g. https://tickets.example.com/settings).
Self-hosted bot
The settings panel is located at /settings on the origin you set as the HTTP_EXTERNAL environment variable.
You can get a link by typing settings in the bot's console.
After logging in, you should see a list of guilds that you have permission to manage. Select the guild you want to add the bot to, then refresh the page after authorising the bot. You can then navigate to the guild's settings page.
Command permissions
Before you start configuring the bot, you may want to clean up the application command selector for your members.
The bot will usually manage the overwrites on staff-only commands for you (so these commands are hidden from members), but ticket-only commands are not modified by the bot.
This means that
Pin message/claim*/close/move*/priority*/release*/topic/transfer
will be visible in every channel (although commands marked with * will only be visible to staff), despite the fact they can only be used in ticket channels.
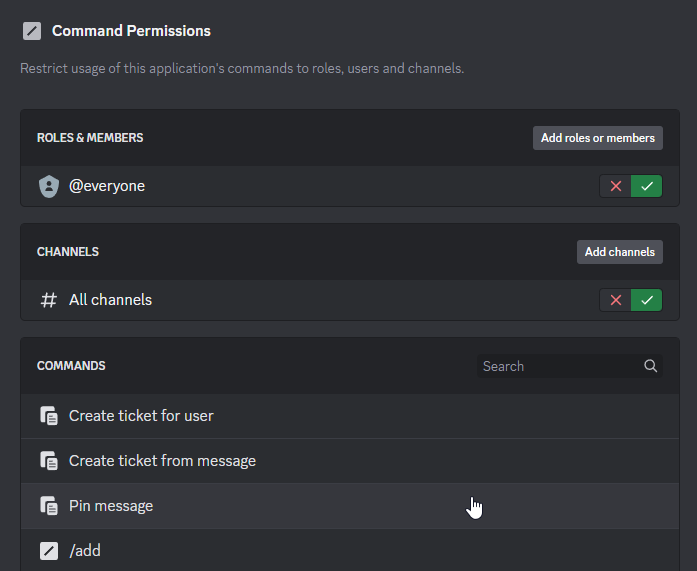
To hide these commands, go to your Server Settings (in Discord), then go to the Integrations page and select the bot.
Keep the default as enabled in "All channels".
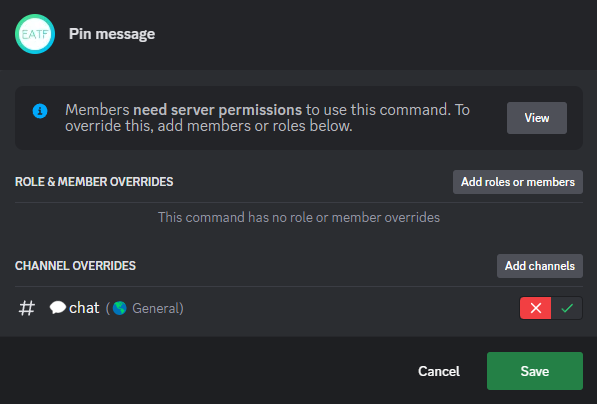
Click on each of the commands listed above and add all of your channels, disabling the command in each channel.
This will allow members to use commands such as /new and /transcript in any channel,
whilst commands such as /close and /topic won't be visible in most channels.

